
Simple portrait lighting setup

Here’s a brief breakdown of my lighting setup for my Peter Mansbridge shoot.
I had about half an hour to setup and 20 minutes to shoot Mr. Mansbridge. He is a very important figure in Canada and I was quite nervous! I didn’t have an assistant which meant I needed to carry minimum gear and I needed to shoot very fast. I decided to shoot with my favourite portrait lens, the Canon EF 85mm f1.8 on the 5D Mark II.
Here’s what my lighting setup looked like:
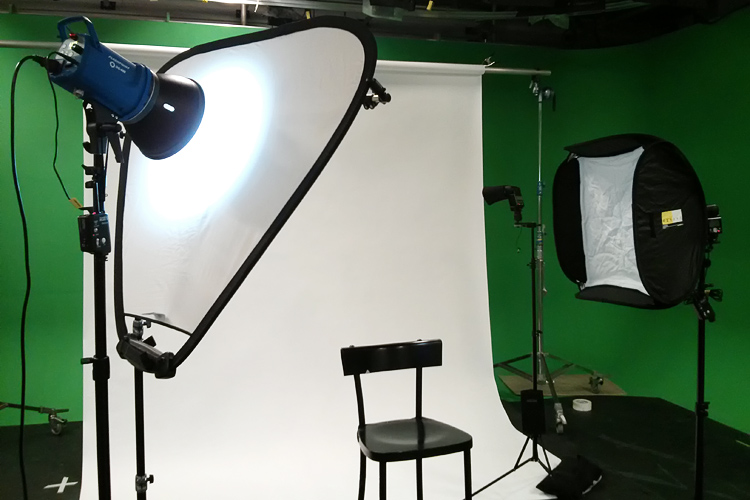

For my key light I wanted to try the new Adorama Flashpoint DG600 Monolight which I was sent a while back to test. I didn’t have a softbox for it so I used my handy Lastolite Trigrip as a diffuser instead. It’s a 300w/s unit which I set to 80% output. For fill I used a Nikon SB-900 flash unit set to 1/32 power through a Lastolite Ezybox softbox. And finally I used the Canon 550EX flash with a snoot set to 1/16 power to create a small and focused light on the backdrop.
Here’s the backdrop light and key light:
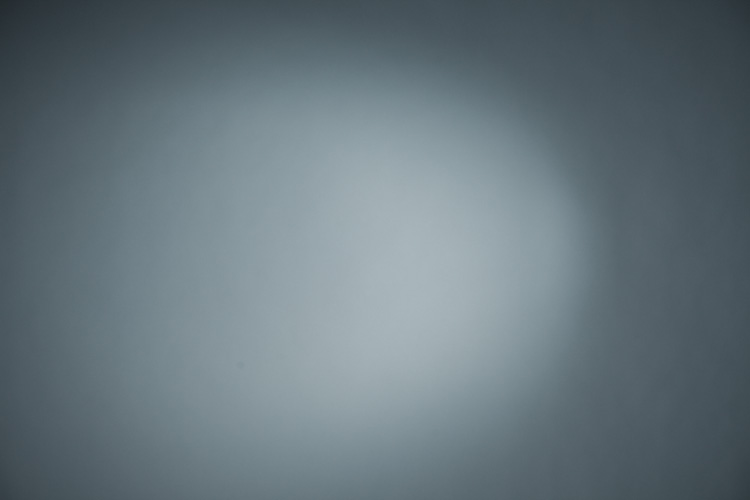
And backdrop and fill light, without the key light:
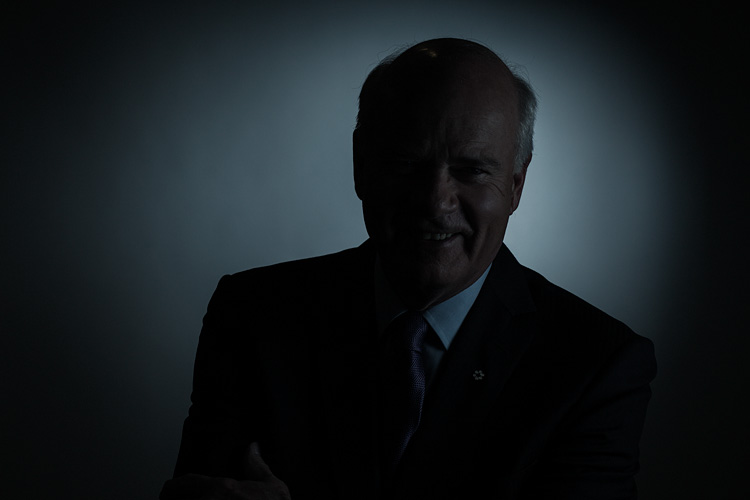
This setup allowed me to shoot at f5.6 so I could keep Mr. Mansbridge sharp but throwing the background out of focus. Shutter speed was at 1/160s which was the maximum sync speed for the DG600.
Overall I was very impressed with the Flashpoint DG600 performance, considering it costs less than half of each of the other two flash units. The recycle time was very fast which allowed me to shoot many frames in sequence without having to wait. And the LED modelling light which can be adjusted indepently is a nice touch. I wish the sync speed would be higher, but for the price and for shoots like this 1/160s is more than enough.
And here’s another shot from the series.

I hope you find this mini tutorial useful.

13 years ago ·
thanks for the tutorial, and shot set up info, it’s always nice to see the behind the scenes set up…..Nice work. Had you considered using the GH3 with the 45mm olympus?
12 years ago ·
Great info, did you do much postproduction on photoshop after?
12 years ago ·
hi there
excellent looking shots.
In terms of sync speed here’s my workaround:
I have a set of Elinchrom speedlights that come with their own wireless transmitter that connects to the camera’s hotshoe
I also have a set of Yongnuo 622 trigger/receivers which allow for incredibly high HSS
I place the Yongnuo on my hotshoe and then piggyback the Elinchrom transmitter onto that and it incredibly takes on the Yongunuo HSS properties!
I’ve shot upto 1/400 using the Elinchrom strobes this way
Just getting into portraits recently after shooting primarily live concerts.
Love the tips!
thanks
Bobby
11 years ago ·
Hey, very nice portrait! I also love the subtle post-processing you had going here. Surprisingly simple setup given the rather high-end result.
Cool stuff!